
Do your weekends consist of cooking, painting, crafting, and building fun new projects for yourself or others? Whether you find yourself creating something every weekend or just once in a blue moon, all those tools and supplies can really clutter up the place pretty quickly. But with a few simple tricks, it’s easy to have a designated spot for all your DIY projects! Here are simple ways to make space for your DIY projects.
Rent A Self Storage Unit
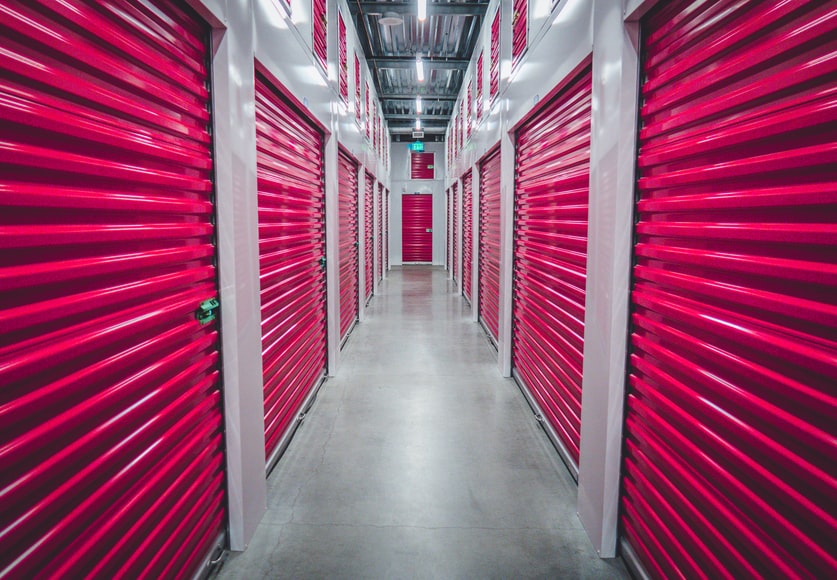
If you really want to get creative and don’t have the room in your home to store all that stuff, it’s time to think outside the box (so to speak) and rent a self-storage unit. You should make use of secure indoor self storage where you can store just about anything there, not just your DIY projects, from books and household items to motorcycles and business inventory, as it’s one of the easiest ways to make space. If you’re not sure what size unit you’ll need, it’s best to overestimate, as you’ll probably want to store all your projects in one unit, though it might be wise to segregate them somehow for easier organization.
Store Them In Plain Sight
If you want to make the most of your space and use it for other purposes as well, consider storing your projects in plain sight. If you like having art on your walls or delicious-smelling candles around the house, why not try hanging up that piece that you’re working on or lighting up the candles you make around the house?
Get Storage Boxes
To make things easier for yourself, try getting some storage boxes you can use to easily group all your different projects together. It’ll save time and prevent headaches (and it will also allow you to move them around as needed).
Then, you can pick an area along with one of your walls where you set up the boxes to store all your projects. This will save room horizontally while allowing for vertical storage so you’ll also be able to store more without thinking too much about it.
Consider The Vertical Space
If there’s no room to store any storage boxes or anything you’d like to set up in plain sight, consider the vertical space. There are plenty of creative ways to use all that dead space vertically so it won’t be so unappealing and cluttered-looking. Here’s how:
Use Shelves With Brackets
You can simply buy some brackets at your local home improvement store, screw them into the wall and hang up some shelves to use for storing all that DIY stuff. Constantly changing seasonal items (such as pumpkins in the fall or holiday décor) will always look great on these shelves!
Use Ladder Shelves
You can also hang up some ladder shelving units, which are great for hanging over windows or doorways. Just be sure you find the studs in your wall first (if you can) before drilling anything in!
Use A Pegboard For Tools And Supplies
Though it’s not as pretty, a pegboard is great for tools and supplies that you want to hang up. You only need the pegboard, hooks, nails, or screws, and an Allen wrench, which you can get at your local home improvement store pretty cheaply (the process of setting it up is usually pretty easy as well). Tools like hammers and screwdrivers are especially great on these boards since they’re the most commonly used.
Hang Baskets Or Plastic Bins For More Storage
If you want to make things even easier, consider hanging up some baskets or plastic bins to store all your smaller projects. You can hang them on the wall (or even inside a larger cabinet if there’s more vertical space inside) and they’ll do the job beautifully!
Store Them In Old Suitcases
If you want to get really creative, consider storing some of your projects inside old suitcases. They’re great for fabric and other large items like that, and you can even store them underneath your bed. Remember to label your cases so you know what’s inside of them!
Repurpose The China Cabinet
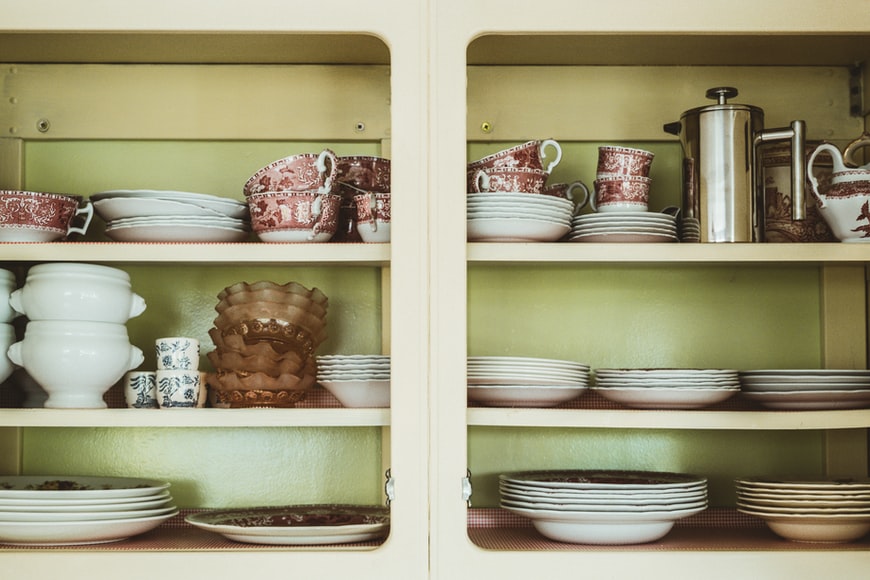
If you already have a china cabinet in your house, consider using it for DIY projects. You can store all your big and bulky items in there and hang smaller items on the doors of the cabinet. Store candles and other small things that don’t take up too much space inside containers or jars before you put them in the cabinet.
Store Them In Old Bookshelves
If you have any old bookshelves laying around, consider using them for your DIY items. Simply remove all the shelves and store your items inside the bookshelf itself. Store fabric in bins or baskets before putting it back inside so it can be better organized.
In conclusion, organizing your DIY projects can be a piece of cake if you know what to do. Simply follow the tips and tricks outlined above and you’ll have all of your stuff stored away in no time!


