
String art was popular in the 70s, but it is come back again as a simple and fun way to make your own artwork. String art is only need a very few materials and it is also an inexpensive way to add some personality to your walls.
Step 1: Gather Materials and Locate an Image
![]()
The materials that you need are:
- A piece of wood cut to the size you want (you can stain or paint it if you wish)
- Computer and printer (to get the image that you want to make)
- Scissors
- Tape
- Linoleum nails (how many you need depends on the size of your project; one pack was enough for this project)
- Hammer
- Embroidery floss in colors of your choosing
First of all, locate an image to use as your pattern for the string art. You can search it on the internet or check around your home for illustration to use as a pattern. Print out the image and cut out its silhouette.
Step 2: Outline the Shape with Nails
![]()
Position the pattern on the piece of wood and use tape to secure it temporarily. lightly pound linoleum nails all the way around the paper pattern with a hammer (try to space them as evenly as possible and nail the, to the same depth.
Step 3: Outline the Shape with String
![]()
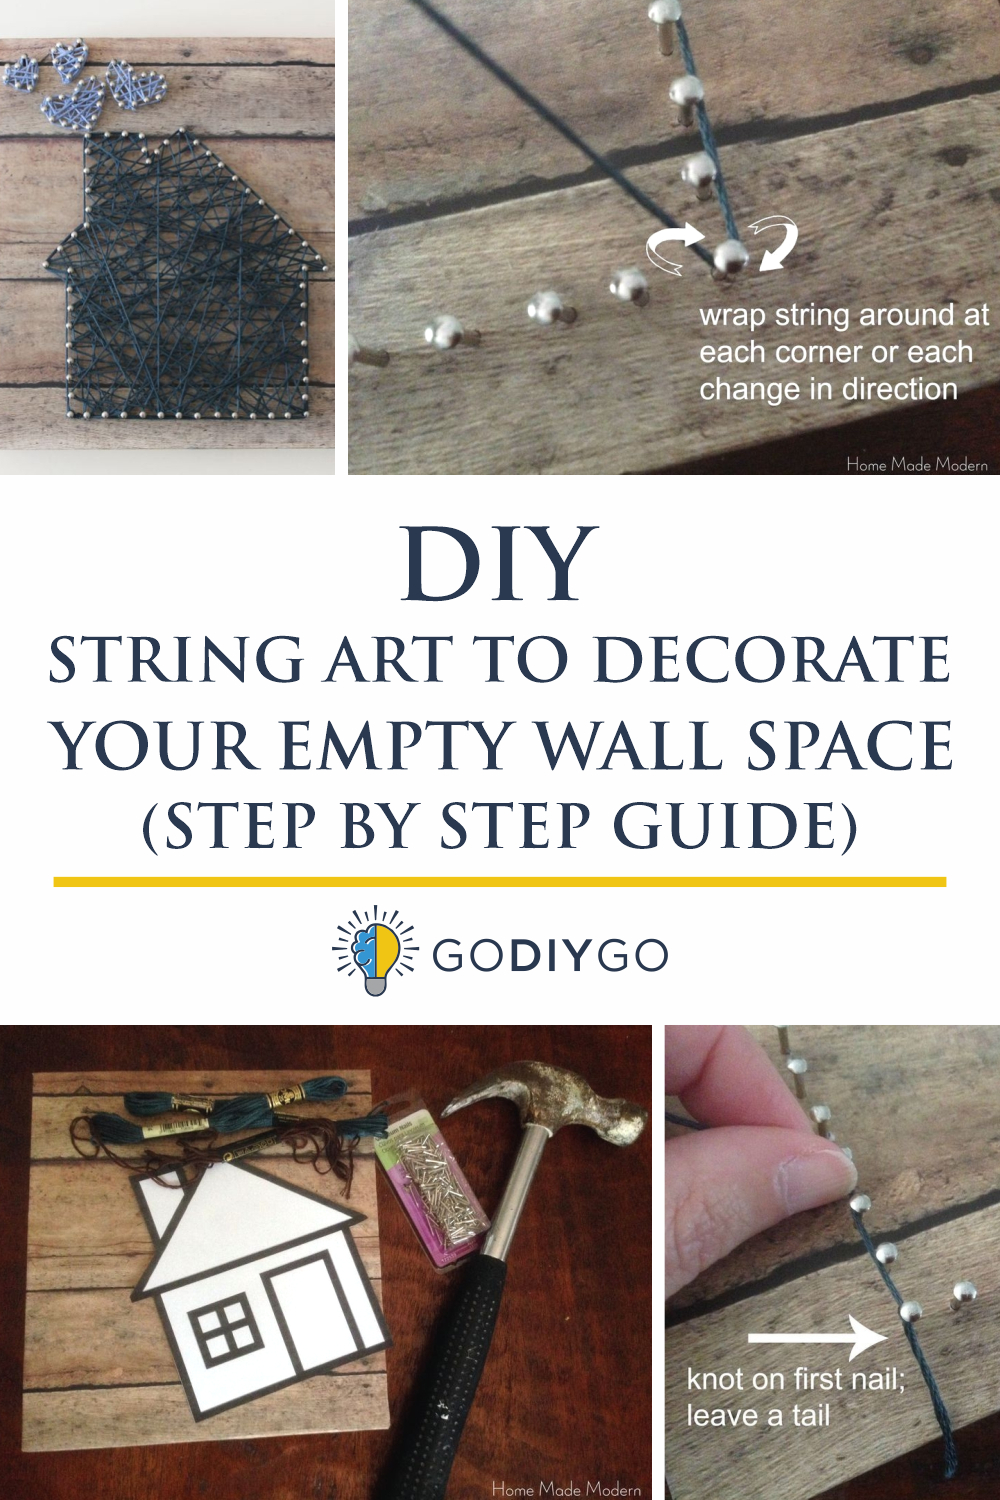
When the shape has been outlined completely with nails, remove the paper pattern and using embroidery floss, outline the perimeter of the shape. Begin by tying the floss to the first nail, and leave a tail for tying off when you are finished.
4. Outline the Shape with String
![]()
Wrap the string tightly around the nail when you reach a corner or need to change the direction of the string to keep things tight and help maintain the integrity of the shape.
5. Fill in the Shape with String
![]()
Begin filling it in by crisscrossing and wrapping from nail to nail once you have outlined the shape with string. There is no rhyme to this process, just go from side to side, top to bottom and corner to corner, varying the length and order randomly. try to end where you left a tail of string at the beginning if you see that you’re about to run out of string. Knot the ends tightly and start another bundle of floss there as well. Repeat the process until the shape is filled in to your liking and tie off the end when finished. Last but not least, clip the tails of thread.
Here are some tips for you when starting to do your own DIY string art project:
- Look for images and patterns that have fairly simple and straightforward outlines.
- To prevent your fingers from getting hit with the hammer, pinch each nail in a clothespin and hold that instead of the nail itself.
- Use all six threads of the embroidery floss. Using fewer will cause the strings to break when you pull it taut against the nails.
- You could use more than one color of embroidery floss to fill in the shape, or choose a variegated string.
![]()


