
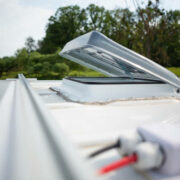
When we think of attics, we often think about dark storage spaces filled with piled boxes, dust, and cobwebs. However, you can use the extra space and transform it into an additional living room, a spare bedroom, or even a tiny library.
Finishing your attic can add length and utility and increase the value of your home, as long as you or your contractor has done it correctly. When done without proper planning or adherence to local building codes, it can reduce the value of your home or stall a sale.
However, if you’re short on budget and pretty good with a saw and hammer, doing this task can be easy! To help you out on your DIY project, here are some ceiling attic door ideas you can try.
But before we proceed to the steps, first, you need to prepare these tools and materials to install the ceiling access door:
- Pencil or marker
- Flashlight
- Drill
- Handsaw
- Screws
- Stud finder
- Construction glue
- 2″ x 6″ lengths board
Step #1 Check Your Attic
Before making any installations, you must check your attic space. Locate the area where attic access door installation is possible. You can install your access panel in between the joists of the attic. Use a stud finder to identify the joists/post and double-check before cutting. The objective of your attic access door will help you determine the perfect place to make a hole.
Afterward, cut a tiny hole, then check for wires attached to the joints. Use your flashlight for a more thorough inspection. If everything is all clear and set, proceed to the next step.
Step #2 Make an Outline
Get the accurate measurement of your attic access door. Use a pencil or marker to mark the hole for your guide. Getting the precise size of your access door is crucial so you won’t have to go back and forth in repeating the steps.
Step #3 Cut a Hole
For easier cutting, saw the areas around the hoist, leaving some spaces between the outer edge of the mark you indicated until it crosses the other joist. Afterward, start removing the ceiling cover and storing it safely.
Step #4 Build the Frame
To do this, start measuring the board and cut it with a handsaw that will fit the ceiling joists. Once finished, tightly drill the boards into the wall joists on each side to create a wooden frame around your access panel. You can prepare or hammer other finishing nails outside to add more strength to the edge.
Step #5 Install the Panel in Place
You can remove the door since it can make installing the panel more convenient. Test the access panel to ensure that it fits and that the size of the whole is enough to hold the whole attic access door. If adjustments are needed, you can easily do so after the fitting.
If you want to match your access panel with the ceiling surface to match your home’s aesthetic interior design, you can paint it with a similar color to your ceilings and allow it to dry.
Takeaway
With these steps, preparing your attic for a whole renovation will be an easy task! But, it is always best to have an assistant by your side to avoid unwanted accidents and make the entire process faster to save time and money.


