The existence of the pantry is quite important. It will be functional to make all your food stock and spices to be well organized. Especially for you who love cooking and have many things to store, the kitchen pantry is important. However, what if you have only a small space to be functioned as the kitchen pantry? No need to worry, in case you have a corner space, you can even have a proper pantry. The best pantry design that we can advise for the small corner space is the L-shape pantry. Just like its name, the pantry will be built and represent the L letter shape. You can have it by building the pantry on each side of the corner. Also, you can have the L-shape pantry by doing the DIY project. You can save your budget and adjust the design based on the space that you have.
Before making the DIY L-shape pantry, the first thing that you should do is prepare the materials and the tools. Of course, the materials should be based on the design and the space that you have. The wider space that you have the more materials that you will need. Here we will make a list of the materials that you might need for your reference.
- Edge glue panel board
- Pre-primed wood boards
- Brad nails
- Tapping screw
- Kreg screw
- Wood Stain
- Polyurethane
- Paint
- Spackle
Then, after the materials, you should also provide the proper tools to help you with the projects. The tools should be adjusted with the materials that you provide. Here are the tools that you will need.
- Miter saw
- Drill
- Brad Nailer
- Kreg jig
- Clamps
- Tape Measure
- Stud finder
- Level
- Table saw or circular saw
Now, when all of the materials and tools are ready, it’s time for you to start with the project. We will guide you to do the L-shape pantry project by providing these steps for you to follow.
1. Cleaning the Space
In case you already have a pantry there, you can remove all of your old shelving materials and parts. Clear all of the items in your pantry such as the rack, bracket, etc. Otherwise, if you don’t have it before you can simply make the space clean and clear. In removing the items from your old pantry, there might be some holes left. Here, you can fill the holes with a joint compound. For the small holes, you can use spackle.

Removing Unused Items from @moderncountrychic

Cleaning the Space Process from @moderncountrychic
2. Cut the Wood
You can cut the wood by measuring the space first. The wood will be functioned as the pantry shelves, trim, and supports. You can cut the wood by using a miter saw that you already prepared before. Don’t forget to size based on the measurement.
3. Stain the Wood
This step is important to match the wood for shelves you already cut before. You should be careful because when you don’t match them well, the shelves can’t be installed well. To make the stain, you can use Provincial. When the stain is already dried, you can use polyurethane to make it easier to clean/wipe.
4. Installing the Support to the Wall
You can use the pencil to mark the wall right on the spot where you want the shelves to be installed. The first thing that you do is install the back support. Then, you can install the right and left wall support. You should make sure that all supports are very secure to the wall.
5. Install the Middle Support Brackets
It can be said that the middle support brackets are the key to the building process of the pantry shelves. The shelves can also be sturdy and stable with the existence of the middle support brackets. You can install the middle support brackets by attaching the middle support boards with Kreg screws.

6. Prime and Paint
What you should do in this step is fill and sand any holes and screw the holes with spackle. Then, you can paint the boards and any other items already installed. Don’t forget to also paint the wall and background area in case you want to add style or make it more impressive.
7. Install the Wood Pantry Shelves
The last step that you do for your L-shaped pantry is to install the pantry shelves. You can install it starting from the bottom to the top. This technique will let you install all the shelves easily. For the last touch, you can install LED hidden lighting so that you can light up the shelves area during the night. Also, the lighting can surprisingly able to beautify the pantry with its light illumination.

Installing the Pantry Shelves Process from @mama_speaks_truth
Design References
Here are the design references for the L-shaped pantry that you can adapt.
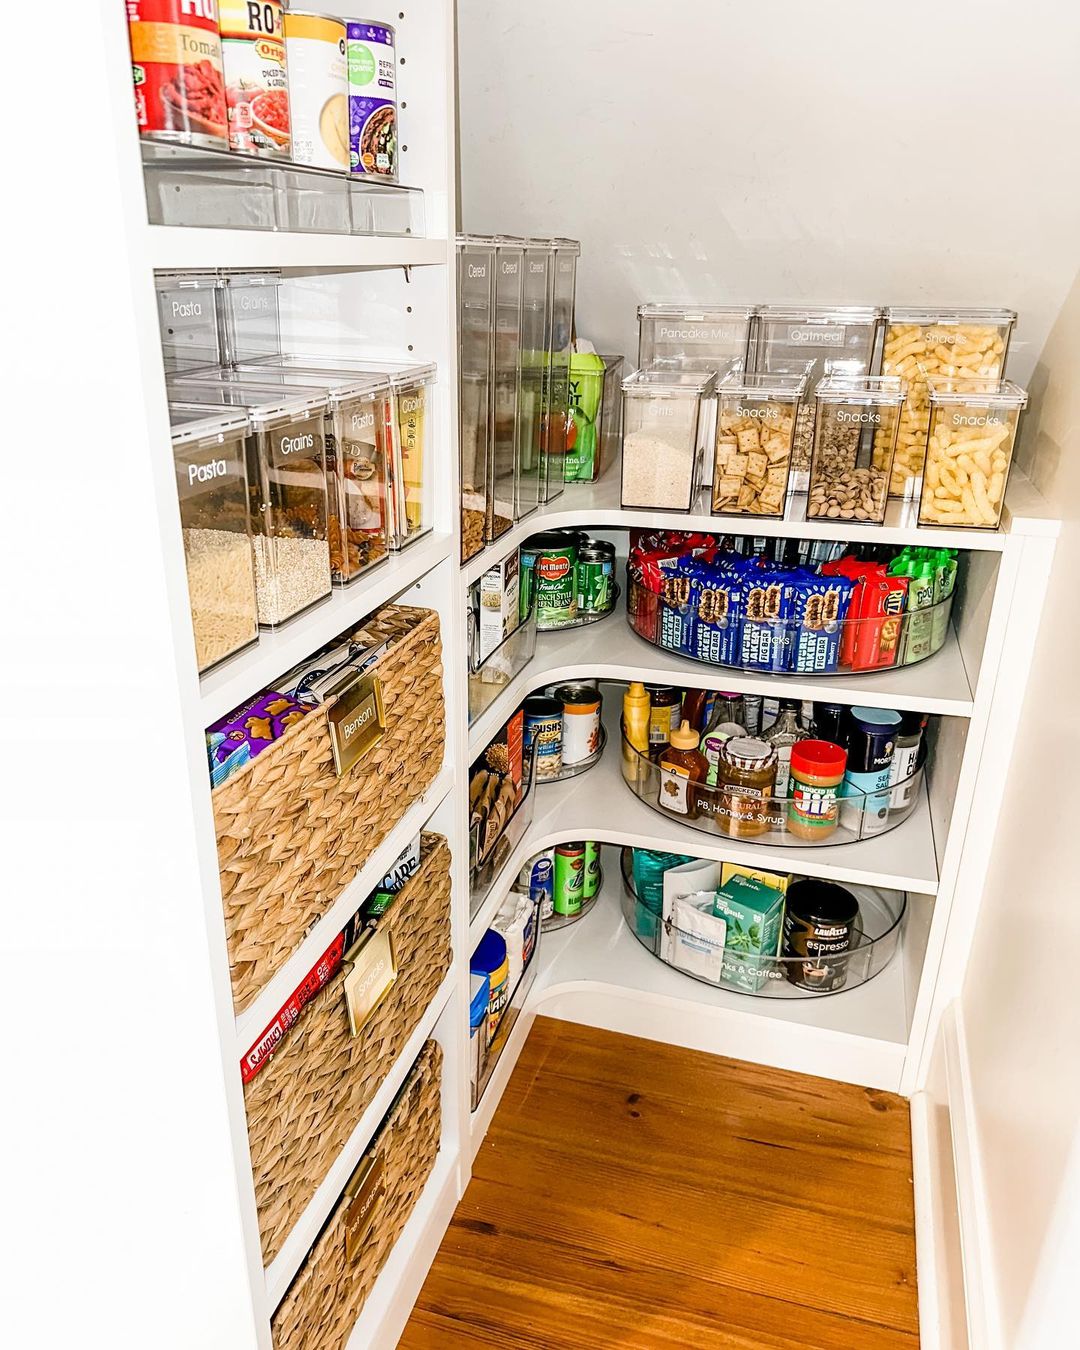
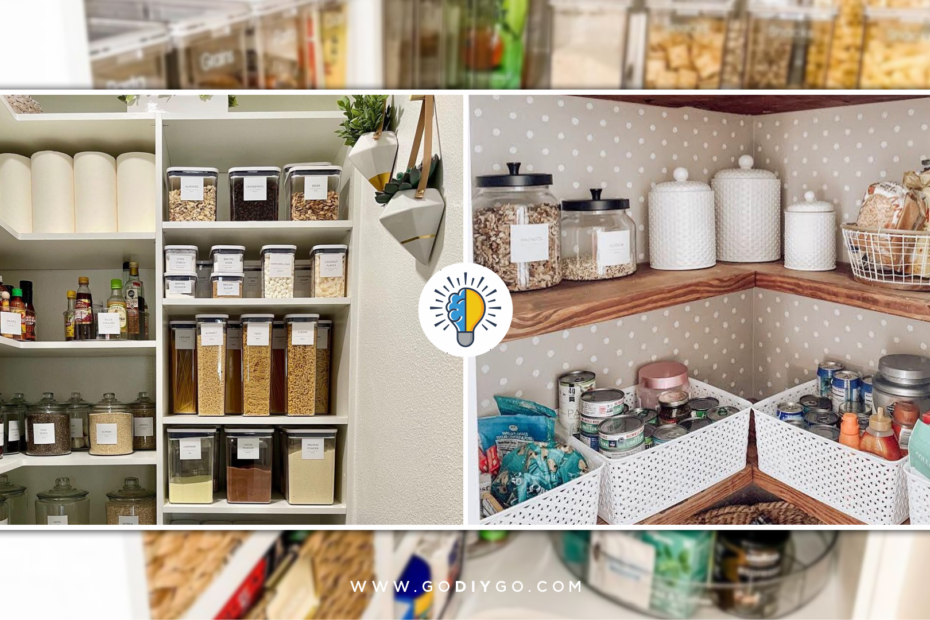
Take your concern on the corner of the shelves which is designed into flowy shape. It will make the pantry not to be seen as rigid and the most important one is that the pantry has an additional aesthetic value. Flowy Corner Design from @aceofspaceorganization

The space between one shelve to another is at different heights. It is functional so that you can put varied sizes of storage or jars in a fit space. You won’t let the space be left unused by having this technique. You can see it in this image where the shelf gap is tiered between the left and right ones. Tiered Shelves Design from @talentedkitchen

In case you like something straight and neat, you can have this kind of pantry shelf design. No need to have it tiered if you don’t like it. However, we recommend you provide the fit baskets, storage, or jars so that the pantry can be seen as well arranged and ordered. Fit Size Design from @talentedkitchen

To add beauty to your L-shaped pantry, you can apply the pattern. You can do it by painting the pantry or simply installing the wallpaper just like what we have here. You should install the wallpaper as your first step before installing other items. Pattern Application from @talentedkitchen
