
What do you want to do with your kids this week? Is that going to a museum or bookstore or just playing at home? Doing something with your kids on weekend will make them feel fun and happy. What about creating crafts? You can make DIY toys with your kid by using inexpensive materials. For example, creating DIY toy cars from egg cartons.
Yes. It’s time for you to not throw away your egg cartons. Use them to make toy cars in your own version. Check out the ways.

First of all, you need to collect the materials needed. Prepare egg cartons, buttons, yellow craft paper, white craft paper, and acrylic craft paint. Then, get the tools needed such as scissors, a hot glue gun, and a hot glue stick.
You don’t need to buy anything if all of them are in your storage. Then, you can start making your toy cars with the kids.

Are you ready?
Cut the egg carton to get an individual cup. Make sure you do it carefully to keep the cup shape. It will become the body of your toy car. Paint the cup in any color you want like blue, yellow, red, or even black. Once all surfaces have been painted well, let the cup dry.
While waiting for the cup to dry, you can cut white craft paper into a rectangular shape. Later on, it will become the window of your car. Let your kid cut it for you. They will love it so much. Ask your kid to cut the yellow craft paper into some small circles. Those will be used as the car’s lights.

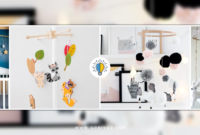
If the cup has dried, it is time to glue. Glue the white rectangular paper as the window and the circles as lights. To complete the car, you have to glue the buttons as wheels using a hot glue gun. Then, add any additional embellishments you like to beautify your new toy car. Make toy cars as many as your kids want.
These toys cars will only need around 1$. You can finish this project in less than an hour. The toy cars are ready to play. Don’t forget to clean the space after you finish this project. And… have fun!